A pair of finishes for you today. Both are baby quilts for one little baby soon to make her appearance! First up:
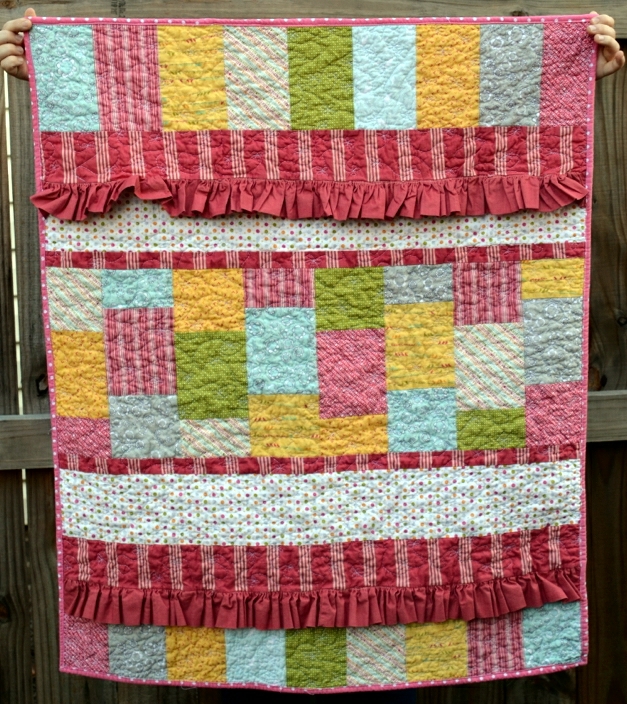
back:
Details:
Fabric - Noteworthy and Sunkissed by Sweetwater, Athill Range and Northcote Range by Cabbages and Roses; backing Tea Dots by Michael Miller Fabrics
Pattern - Vintage Baby by Amy Hamberlin
Thread - piecing: Aurifil; quilting: Isacord
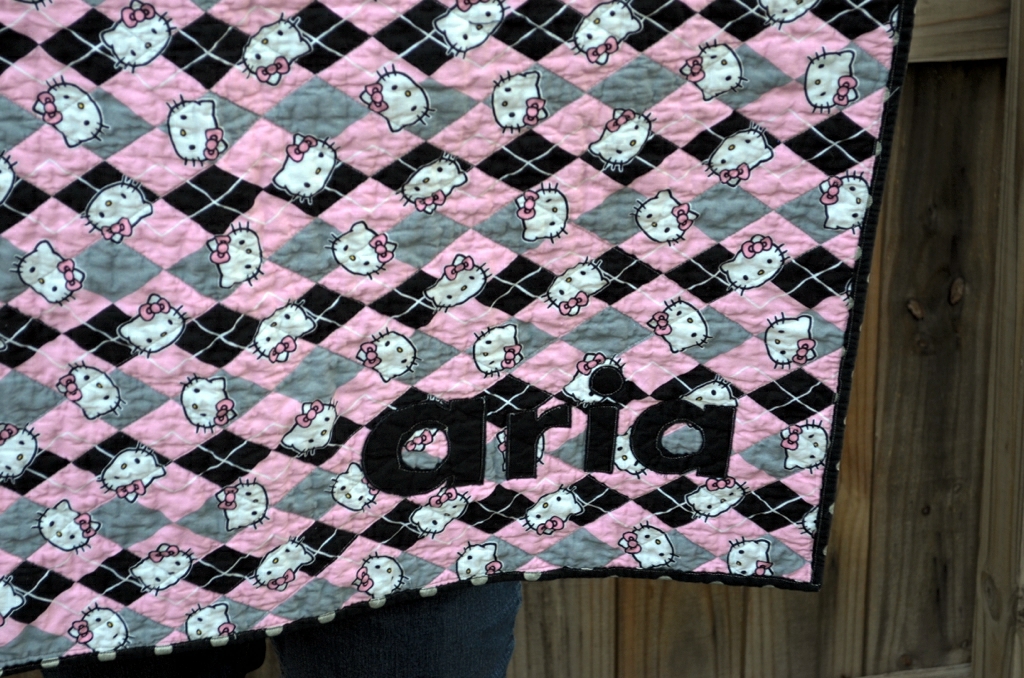
Then at the last minute (the afternoon before the shower) I decided to make another one…this one was incredibly simple…2 pieces of fabric, throw in some batting and get it quilted together!
and then I decided to add her name to the front just to add something else to it:
and I'm seriously in love with the backing fabric! (it's just black with silver dots, and I want more!!)
Details:
Fabric - Hello Kitty and backing both purchased from Joanns
Thread - Aurifil
Extra - Wonder Under by Pellon
Both quilts were delivered to the shower yesterday, which I unfortunately had to miss as I fell ill a few hours before. I will see them again, and I know they will be well used…which is the best I can ask for of any quilt!!
Showing posts with label Pellon. Show all posts
Sunday, November 17, 2013
Tuesday, October 29, 2013
Super love for a Supertote!
Had a great weekend spending plenty of time sewing (Saturday was a bit of a bust, but there was fabric shopping done that day...so it's all good in my book). Sunday was the big sew day...I finally got to work on a Supertote (pattern by Noodlehead). It took me a grand total of 8 hours to get this puppy put together! The first 3 hours were spent on cutting and fusing interfacing...that always seems to take forever, but once I got past that...it was pretty clear sailing. The pattern is so clearly written and easy to follow. I had a problem with one part...and that's all me, not the pattern itself. I don't know what it is with me and zippers...but every time I use a pattern that calls for a zipper...I have to read the instructions 20 times. The first time I read the steps for this one...I could not understand it...and then I read it 5 more times...still didn't get it. I had to take a break and then come back and read it to finally understand what it was saying...I think it's mental...I see "zipper" and my brain shuts down.
Anyways...like I said the pattern was really easy to follow, and I am thrilled with how this bag came out! (all pics from instagram because I've gotten lazy and haven't been getting out my real camera lately to capture some good pictures)
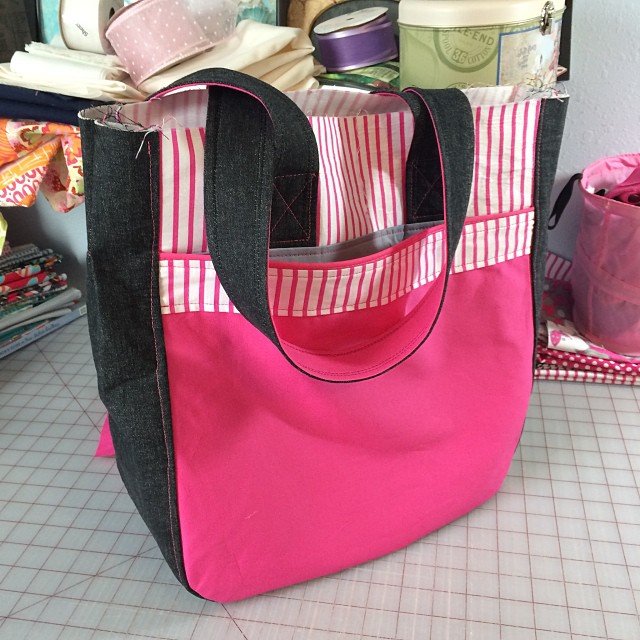
"Front" side (the pink panel is a pocket, I made it fully lined and am so thrilled with how the piping looks!)
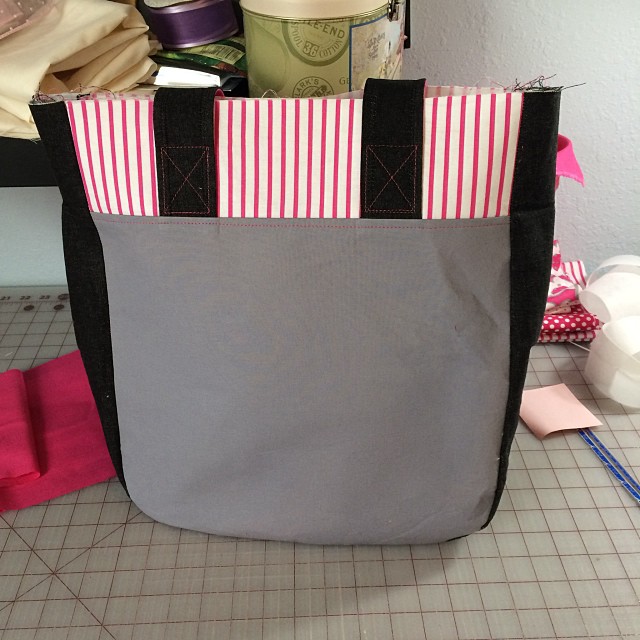
Back side
Sort of picture of the fully finished tote (love the recessed zipper!):
Inside
This particular bag is not for me...I'm making this to serve as a diaper bag for my friend (that I've been working on the other baby stuff for). But I already have (at least in my head) planned a couple more of these! Now that I know how it all goes together, I can definitely see it taking less than 8 hours per bag, and I will add the magnetic snap that is listed as an option in the pattern. I didn't add it this time because I just didn't want to take the time to do so. I know they don't take long...but at hour 5-6...I just didn't feel like it! LOL!
And now I'm off to work on a different bag...Girl would like a new one, so I'm going to try out the 241 tote (pattern also by Noodlehead).
Details:
Supertote pattern by Anna Graham
Fabric: Kona Cotton in Bright Pink and Med. Grey, the rest are prints picked up from Hancock Fabrics and a black denim also from Hancock
Thread: Coats and Clark universal (worked great, a bit linty, but my machine didn't balk at all!)
Interfacing: Pellon 808 (I used what the pattern recommended)
Anyways...like I said the pattern was really easy to follow, and I am thrilled with how this bag came out! (all pics from instagram because I've gotten lazy and haven't been getting out my real camera lately to capture some good pictures)
"Front" side (the pink panel is a pocket, I made it fully lined and am so thrilled with how the piping looks!)
Back side
Sort of picture of the fully finished tote (love the recessed zipper!):
Inside
This particular bag is not for me...I'm making this to serve as a diaper bag for my friend (that I've been working on the other baby stuff for). But I already have (at least in my head) planned a couple more of these! Now that I know how it all goes together, I can definitely see it taking less than 8 hours per bag, and I will add the magnetic snap that is listed as an option in the pattern. I didn't add it this time because I just didn't want to take the time to do so. I know they don't take long...but at hour 5-6...I just didn't feel like it! LOL!
And now I'm off to work on a different bag...Girl would like a new one, so I'm going to try out the 241 tote (pattern also by Noodlehead).
Details:
Supertote pattern by Anna Graham
Fabric: Kona Cotton in Bright Pink and Med. Grey, the rest are prints picked up from Hancock Fabrics and a black denim also from Hancock
Thread: Coats and Clark universal (worked great, a bit linty, but my machine didn't balk at all!)
Interfacing: Pellon 808 (I used what the pattern recommended)
Sunday, September 8, 2013
A memorable finish
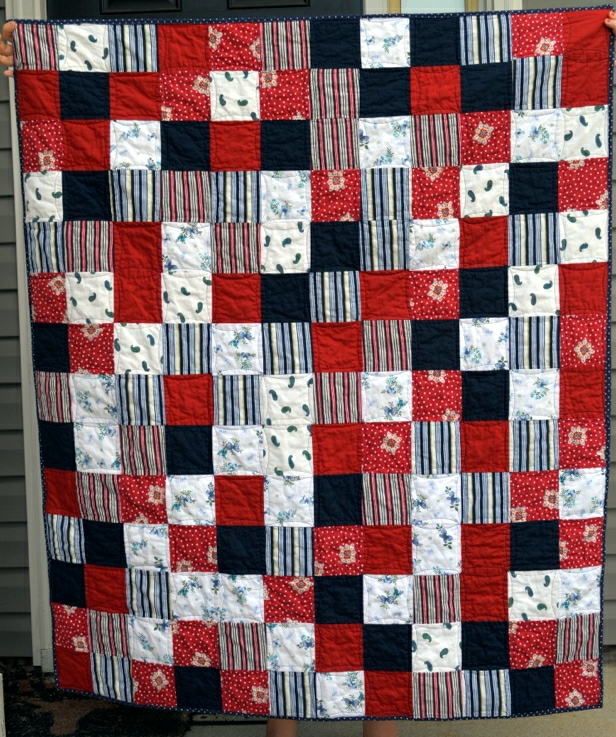
Well, got one thing officially crossed off my list this weekend. I quilted and bound the RWB quilt!
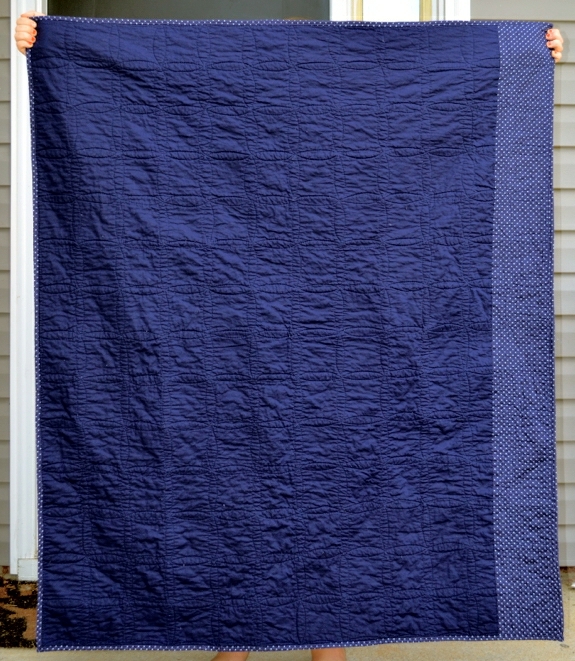
This quilt is a memory quilt for Guy's cousin. She had saved many of her mother's shirts and sent them to me almost 2 years ago to make them into a quilt for her. This quilt was very difficult for me to work on, as her mother is missed by all of us. Today I finally got it finished and I'm very excited to get it sent off to Guy's cousin.
Front:
Back:
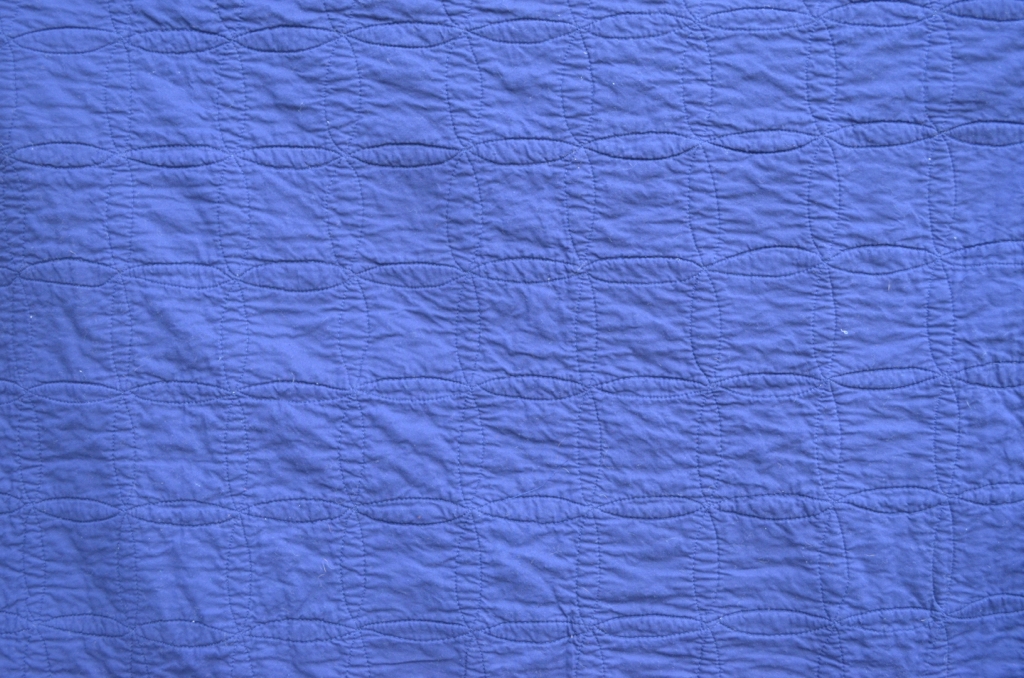
Quilting:
I used a pattern out of Natalia Bonner's book Beginner's Guide to Free Motion Quilting. I marked each row with chalk to get the curve roughly the same (I did finish up the last few rows without marking as I felt I had a good handle on it) and FMQd with Isacord (once again, love this stuff!).
Details:
Fabric: all solids and blue polka dot from my stash
Batting: Pellon
Thread: Piecing and binding - Mettler Metrosene; quilting - Isacord
This quilt is a memory quilt for Guy's cousin. She had saved many of her mother's shirts and sent them to me almost 2 years ago to make them into a quilt for her. This quilt was very difficult for me to work on, as her mother is missed by all of us. Today I finally got it finished and I'm very excited to get it sent off to Guy's cousin.
Front:
Back:
Quilting:
I used a pattern out of Natalia Bonner's book Beginner's Guide to Free Motion Quilting. I marked each row with chalk to get the curve roughly the same (I did finish up the last few rows without marking as I felt I had a good handle on it) and FMQd with Isacord (once again, love this stuff!).
Details:
Fabric: all solids and blue polka dot from my stash
Batting: Pellon
Thread: Piecing and binding - Mettler Metrosene; quilting - Isacord
Saturday, July 6, 2013
A Scrappy finish
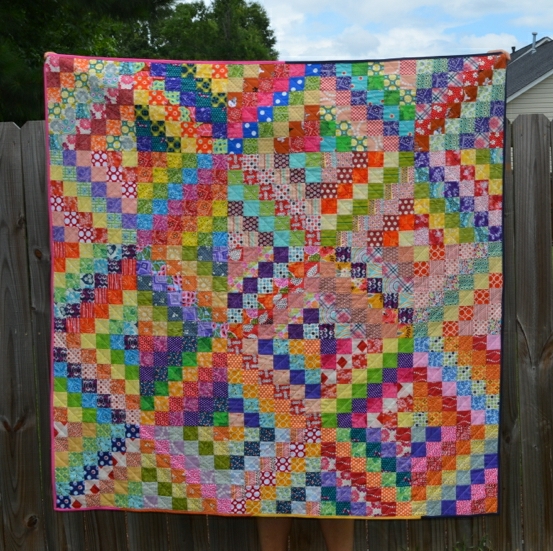
Woohoo! Attached the binding, and now I can officially call my Scrappy Trips quilt finished!
Front
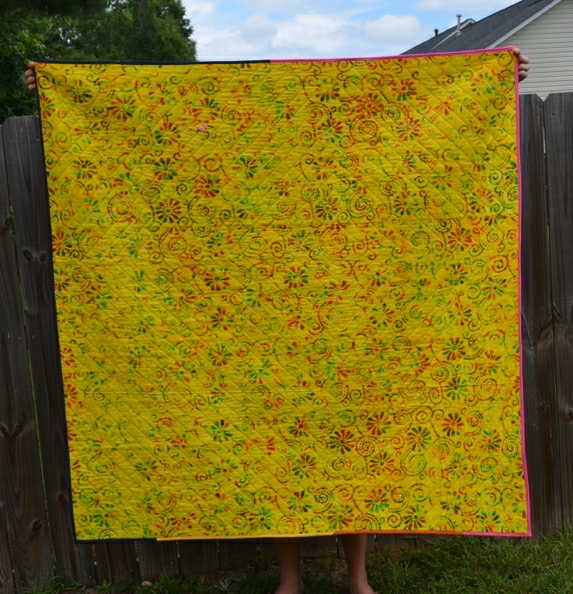
Back
First began: January 7, 2013
Details:
Pattern/Tutorial - Scrappy Trip Around the World by Bonnie Hunter
Fabric - from my stash; backing - batik purchased from Hancock Fabrics
Thread - piecing: Mettler and Gutterman; quilting: Aurifil
Batting - Pellon
QAL - Scrappy Trip Along #scrappytripalong
Front
Back
First began: January 7, 2013
Details:
Pattern/Tutorial - Scrappy Trip Around the World by Bonnie Hunter
Fabric - from my stash; backing - batik purchased from Hancock Fabrics
Thread - piecing: Mettler and Gutterman; quilting: Aurifil
Batting - Pellon
QAL - Scrappy Trip Along #scrappytripalong
Saturday, June 22, 2013
Another bag...and busting open the stash...
Good Morning! Hope your Saturday is dawning even half as lovely as mine! (Girl is at the grandparents, Guy is out on an adventure...so just me and the dogs, and the day and house all to myself!!!).
Took yesterday off from work (desperately needed some recharging!) and dropped in to a new-to-me fabric store and then my regular local shop (Creative Sewing Machine Center) and came out with a few things. The new-to-me shop...I may go back...we'll see...I picked up some voile by Joel Dewberry and Amy Butler, and a nice yard cut of an Amy Butler Alchemy print I hadn't seen around these parts yet.
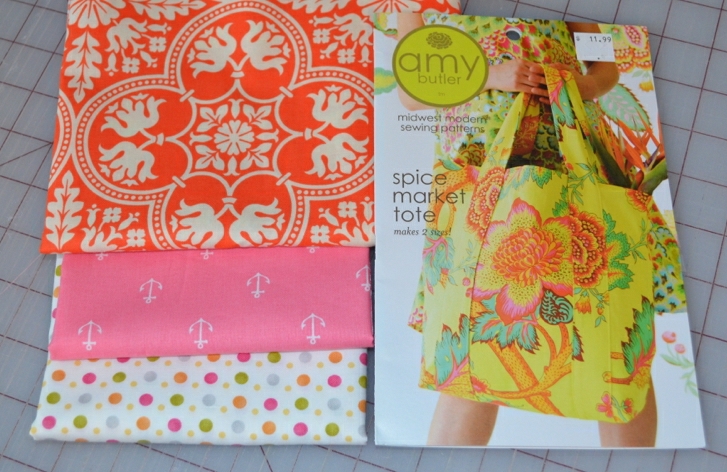
At my regular shop...I could spend hours there...just wandering around, checking everything out...I ended up leaving with a new bag pattern, some Joel Dewberry Notting Hill for the new bag, some Bella Snow to line the bag, and then a few cuts of other stuff to add to the stash.
I came home and whipped up the bag (well...sort of...took about 5 hours...)
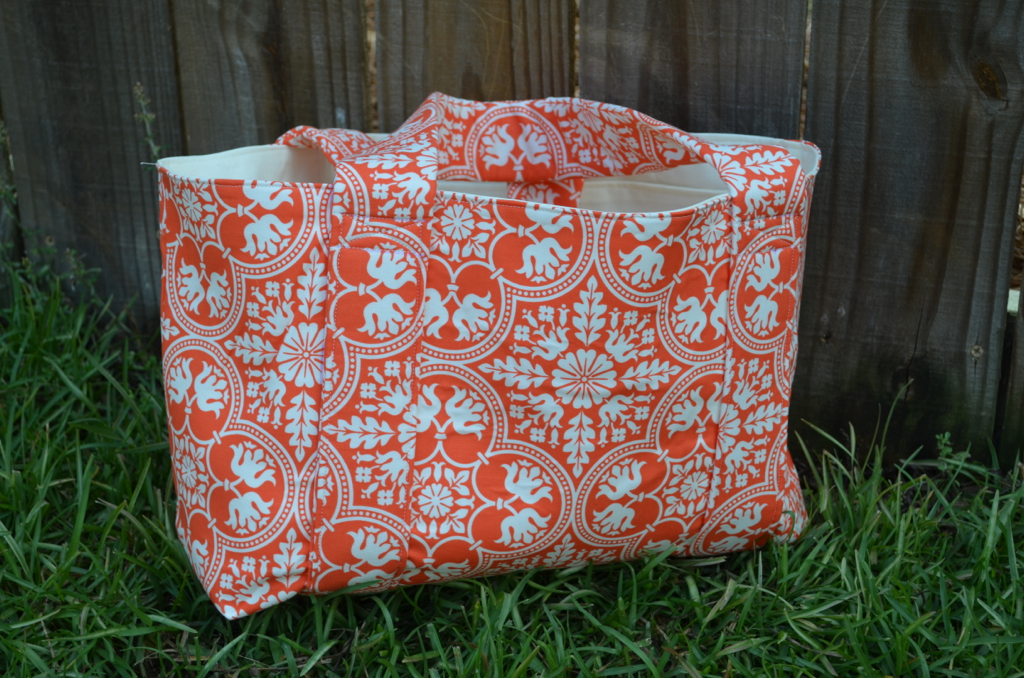
I made the small size of the pattern and made two minor modifications, one intentionally and one not. The first, I used fusible fleece in the handles instead of the SF101 (both from pellon) the pattern called for, (lots of SF101 used, and I love how the bag stands up on it's own!). The second modification was because I had a serious issue figuring out the pockets...they came out all kinds of wonky. It was also my one issue with the pattern, the cutting instructions left a lot to be desired when it came to understanding how the pocket should be cut out. (I'll probably reread it later and it make perfect sense, but at the time...nope). This bag is intended to be my gym bag, as the duffle I was using is just plain too big, and the other tote I have is already designated (and filled with) beach/pool stuff. I think it will work out, if not, then I'll make the tote in the larger size. I like the bag, and it will be used!
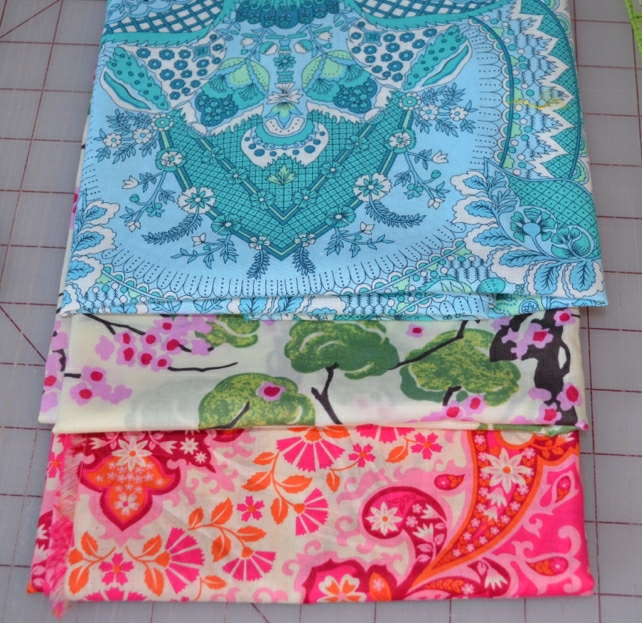
Now...on to busting the stash...I had to laugh at myself after bringing home my fabric purchases yesterday...because once again...I hit up Joel Dewberry's Notting Hill. Which by the purchases I have made of that line alone, I would have to say it's my absolute favorite. Here is what I'm talking about:
(Some of the pieces I received in my awesome Sew South goodie bag!). And the above photo only represents the pink color way. I also have the rest of the collection in the teal and other color way (can't remember what color that one is). My Sisters Ten BOM blocks are utilizing the one color way...and the teal is patiently waiting it's turn. (Ok...truth...I've been hoarding the pink and teal...). And now I think it's time I just cut into them and make something...probably from the pink. (I do have a purse and now the spice market tote in Notting Hill pinks/orange already) Because I love pink and orange. So perhaps a quilt...just for me...no idea what pattern I'm going to use (considered Swoon...but I haven't even finished my original Swoon quilt yet!). So I'll add that to the list of things to happen. And not purchase anymore Notting Hill until I do...I better get this quilt done fast!
Well, I must be off...my sewing machine desperately needs a cleaning...and then I've got a quilt top to finish putting together...and I'd like to get two of my "to be quilted" tops basted and ready to be quilted...and then...well...we'll see how far I get!
Took yesterday off from work (desperately needed some recharging!) and dropped in to a new-to-me fabric store and then my regular local shop (Creative Sewing Machine Center) and came out with a few things. The new-to-me shop...I may go back...we'll see...I picked up some voile by Joel Dewberry and Amy Butler, and a nice yard cut of an Amy Butler Alchemy print I hadn't seen around these parts yet.
At my regular shop...I could spend hours there...just wandering around, checking everything out...I ended up leaving with a new bag pattern, some Joel Dewberry Notting Hill for the new bag, some Bella Snow to line the bag, and then a few cuts of other stuff to add to the stash.
I came home and whipped up the bag (well...sort of...took about 5 hours...)
I made the small size of the pattern and made two minor modifications, one intentionally and one not. The first, I used fusible fleece in the handles instead of the SF101 (both from pellon) the pattern called for, (lots of SF101 used, and I love how the bag stands up on it's own!). The second modification was because I had a serious issue figuring out the pockets...they came out all kinds of wonky. It was also my one issue with the pattern, the cutting instructions left a lot to be desired when it came to understanding how the pocket should be cut out. (I'll probably reread it later and it make perfect sense, but at the time...nope). This bag is intended to be my gym bag, as the duffle I was using is just plain too big, and the other tote I have is already designated (and filled with) beach/pool stuff. I think it will work out, if not, then I'll make the tote in the larger size. I like the bag, and it will be used!
Now...on to busting the stash...I had to laugh at myself after bringing home my fabric purchases yesterday...because once again...I hit up Joel Dewberry's Notting Hill. Which by the purchases I have made of that line alone, I would have to say it's my absolute favorite. Here is what I'm talking about:
(Some of the pieces I received in my awesome Sew South goodie bag!). And the above photo only represents the pink color way. I also have the rest of the collection in the teal and other color way (can't remember what color that one is). My Sisters Ten BOM blocks are utilizing the one color way...and the teal is patiently waiting it's turn. (Ok...truth...I've been hoarding the pink and teal...). And now I think it's time I just cut into them and make something...probably from the pink. (I do have a purse and now the spice market tote in Notting Hill pinks/orange already) Because I love pink and orange. So perhaps a quilt...just for me...no idea what pattern I'm going to use (considered Swoon...but I haven't even finished my original Swoon quilt yet!). So I'll add that to the list of things to happen. And not purchase anymore Notting Hill until I do...I better get this quilt done fast!
Well, I must be off...my sewing machine desperately needs a cleaning...and then I've got a quilt top to finish putting together...and I'd like to get two of my "to be quilted" tops basted and ready to be quilted...and then...well...we'll see how far I get!
Thursday, May 9, 2013
Scratch one off the list...
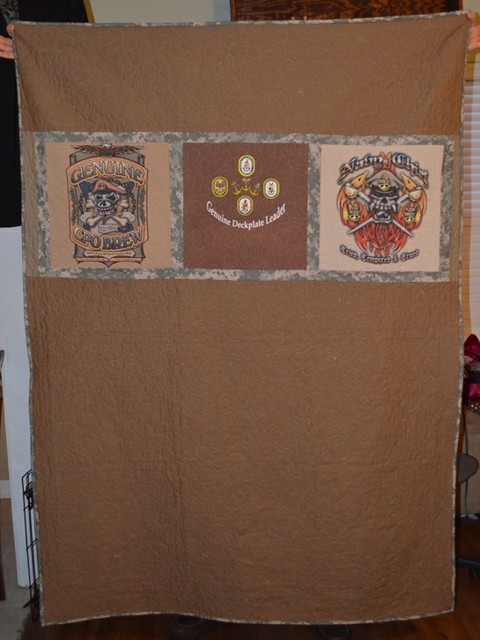
and mark this deadline as met! I just finished up the Camo quilt a few minutes ago. Finished the quilting yesterday, so all that was left was the binding, which I prepped last night!
Front:
Back:
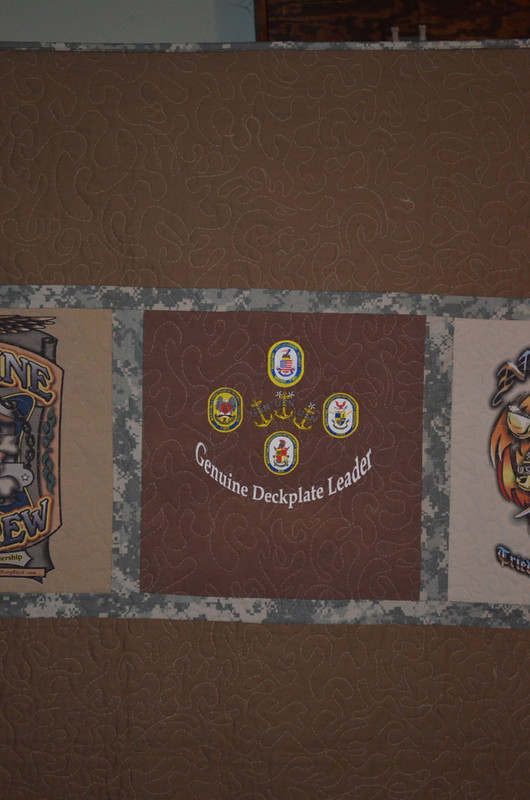
Close up of the quilting:
I FMQd a large stipple/meander...and it is by far my best attempt yet!
I'm so excited to deliver this one to the recipient tomorrow!
Details:
Pattern - sew T-shirts together...end of story
Fabric - Kona solids, Camo material is from unknown source
Interfacing - Pellon 911FF
Batting - Pellon (first time I've used this kind, so excited to see how it washes)
Thread - piecing and quilting - Mettler; binding - Gutterman
Front:
Back:
Close up of the quilting:
I FMQd a large stipple/meander...and it is by far my best attempt yet!
I'm so excited to deliver this one to the recipient tomorrow!
Details:
Pattern - sew T-shirts together...end of story
Fabric - Kona solids, Camo material is from unknown source
Interfacing - Pellon 911FF
Batting - Pellon (first time I've used this kind, so excited to see how it washes)
Thread - piecing and quilting - Mettler; binding - Gutterman
Sunday, May 5, 2013
getting there...
Well...I am making pretty good progress on at least one quilt on my "deadlines" list from Friday.
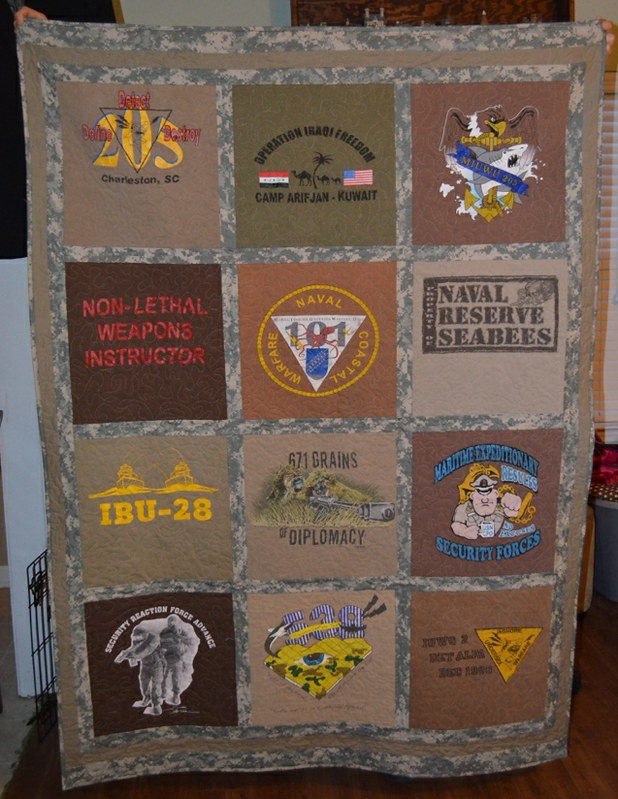
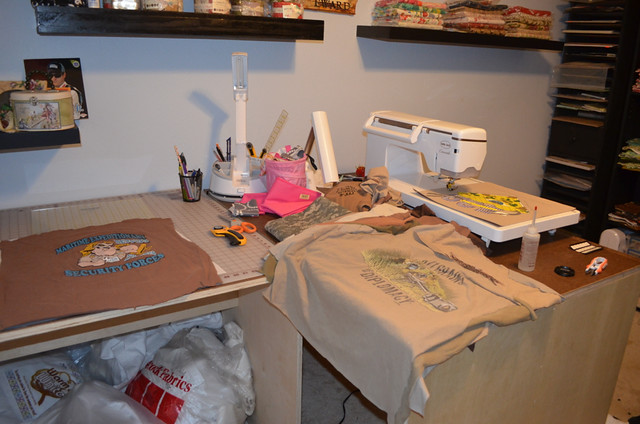
I started working on the T-shirt quilt on Thursday, mostly just doing prep-work. To me, that's the hardest/most tedious part of putting together a T-shirt quilt. I was given a large number of T-shirts to chose from, and since I had this fab camo material all set aside for this quilt, I chose to work with all browns. And then went through the stacks of brown T-shirts, eliminated any doubles...and got to work, assembly line style:
I do a rough cut of all the T-shirts, then fuse the shirts (I used Pellon 911FF), then trim them down. For these shirts, they were large enough that I trimmed them all to match my largest square ruler (15x15). Then it was time to lay them out, then get them sashed...and here they are:
Now...I decided at this point to add some borders (I may only add one), because the person to whom this quilt will belong is a tall fellow (I'll tell you the story of him when I finish this quilt, he's quite a character). So right now, that's where I'm at...sewing on some border(s).
Then I need to get the backing pieced. I'm excited for this one, the back has 3 more shirts, and will be pieced with a nice brown Kona that I picked up.
I even know how I'm going to quilt this one (I think).
So I best be getting to work!
I started working on the T-shirt quilt on Thursday, mostly just doing prep-work. To me, that's the hardest/most tedious part of putting together a T-shirt quilt. I was given a large number of T-shirts to chose from, and since I had this fab camo material all set aside for this quilt, I chose to work with all browns. And then went through the stacks of brown T-shirts, eliminated any doubles...and got to work, assembly line style:
I do a rough cut of all the T-shirts, then fuse the shirts (I used Pellon 911FF), then trim them down. For these shirts, they were large enough that I trimmed them all to match my largest square ruler (15x15). Then it was time to lay them out, then get them sashed...and here they are:
Now...I decided at this point to add some borders (I may only add one), because the person to whom this quilt will belong is a tall fellow (I'll tell you the story of him when I finish this quilt, he's quite a character). So right now, that's where I'm at...sewing on some border(s).
Then I need to get the backing pieced. I'm excited for this one, the back has 3 more shirts, and will be pieced with a nice brown Kona that I picked up.
I even know how I'm going to quilt this one (I think).
So I best be getting to work!
Sunday, April 28, 2013
a lovely match
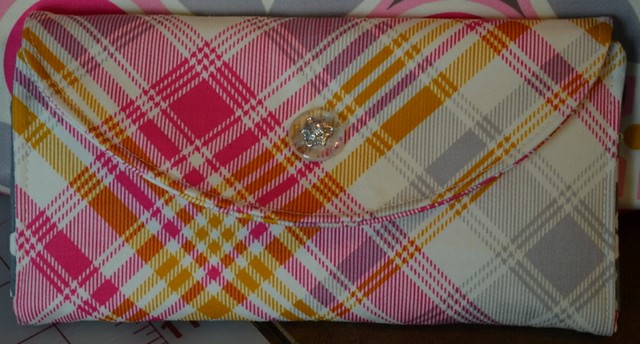
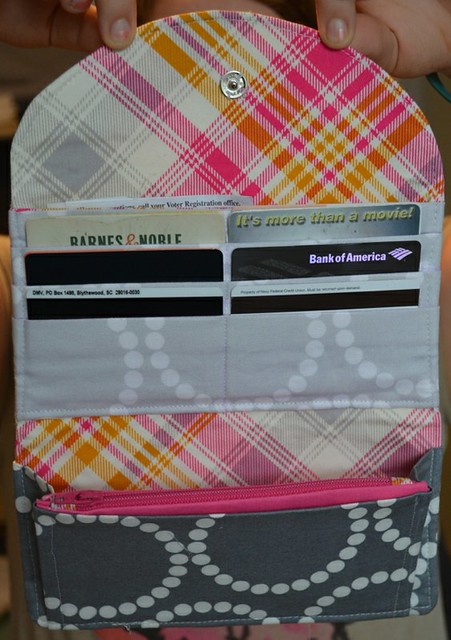
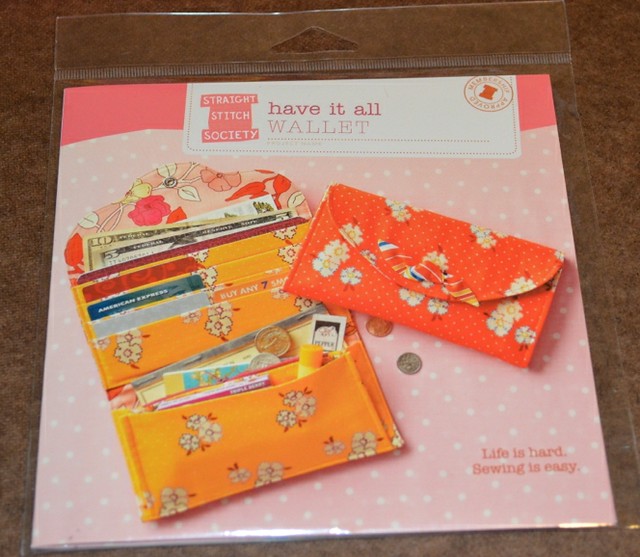
I am so excited...I have finished my Have It All wallet from Straight Stitch Society! Here it is:
I had a blast making it, and the pattern instructions were so easy to follow! Here is a peek of the inside:
I had to think about the zipper pocket a moment or two...but once I realized what it was saying...it went together no problem! I made only one change to the directions, and instead of using a piece of heavy sew-in interfacing, I used Pellon 809 throughout (had lots leftover from constructing my bag), and I think it worked well, plus I wouldn't have wanted to try stitching through all of that!
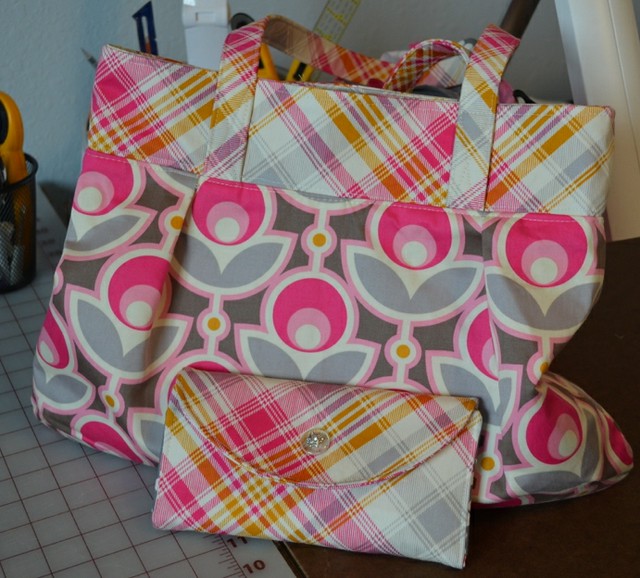
So now I'm all set with a lovely new bag and matching wallet:
And now...what to work on for the rest of the evening....
I had a blast making it, and the pattern instructions were so easy to follow! Here is a peek of the inside:
I had to think about the zipper pocket a moment or two...but once I realized what it was saying...it went together no problem! I made only one change to the directions, and instead of using a piece of heavy sew-in interfacing, I used Pellon 809 throughout (had lots leftover from constructing my bag), and I think it worked well, plus I wouldn't have wanted to try stitching through all of that!
So now I'm all set with a lovely new bag and matching wallet:
And now...what to work on for the rest of the evening....
Saturday, April 27, 2013
Checking in...
Hope you are having as enjoyable a weekend as I! My plans for a sewathon of a weekend are on pretty good track. Now, it hasn't been non-stop sewing...had to take care of a few regular weekend items...but it's been a good 75% sewing...so life is uber good!
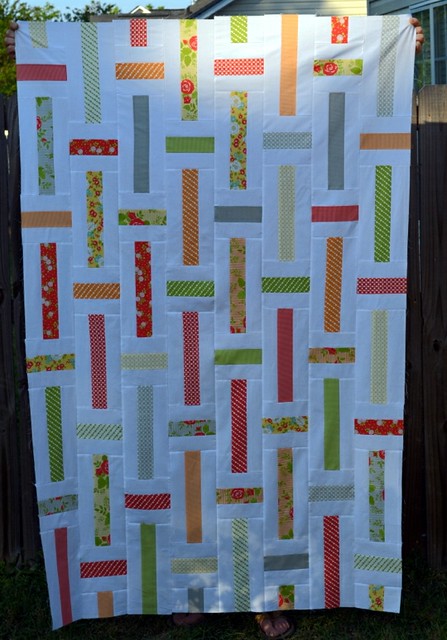
Yesterday I got this quilt top put together:
Next up is basting it...have the backing fabric ready and waiting, just gotta see if I actually have the batting for it!
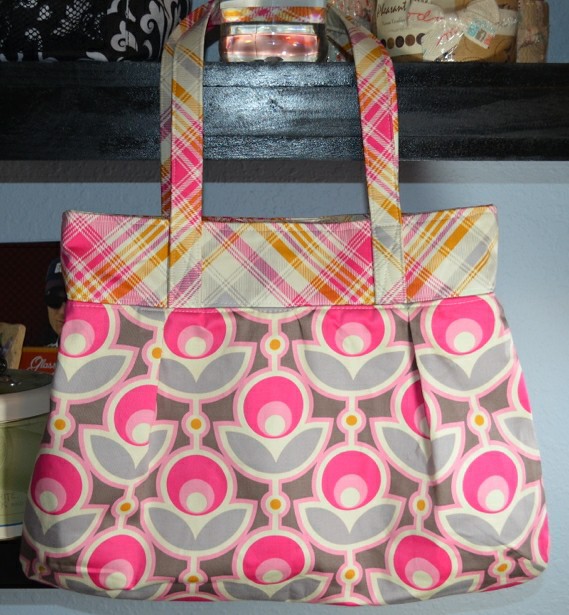
And now...the bag...the bag I am 100% in love with! I have been slowly but surely working on it piece by piece since yesterday evening. And I am just super excited! Here it is:
Pattern: the vera bag by Green Bee Sewing Patterns
Fabric: Joel Dewberry Notting Hill Sateen (Kona Med. Gray lining)
Interfacing: Pellon 809
Thread: Aurifil
Happy factor: THROUGH THE ROOF!
Another look:
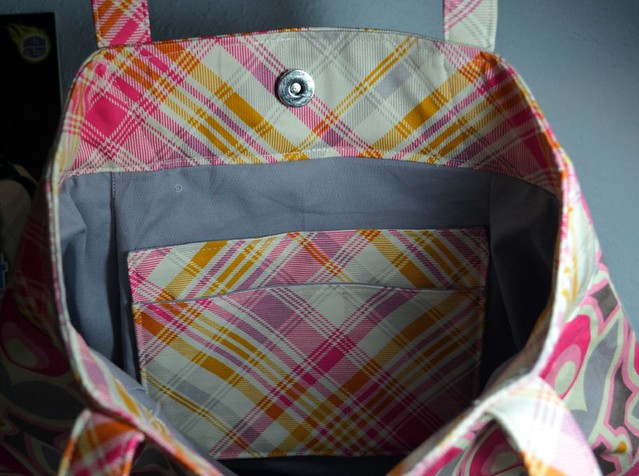
and the inside:
(LOVE THE POCKETS!)
This pattern was so easy to use. And I am over the moon (if you couldn't tell) over how the bag looks! I can't wait to swap out from my current handbag to this one! And a very good possibility I will make another with this pattern in different fabrics!
and next up...I think I am going to make a matching wallet using this pattern:
I'll let you know how it goes!
Yesterday I got this quilt top put together:
Next up is basting it...have the backing fabric ready and waiting, just gotta see if I actually have the batting for it!
And now...the bag...the bag I am 100% in love with! I have been slowly but surely working on it piece by piece since yesterday evening. And I am just super excited! Here it is:
Pattern: the vera bag by Green Bee Sewing Patterns
Fabric: Joel Dewberry Notting Hill Sateen (Kona Med. Gray lining)
Interfacing: Pellon 809
Thread: Aurifil
Happy factor: THROUGH THE ROOF!
Another look:
and the inside:
(LOVE THE POCKETS!)
This pattern was so easy to use. And I am over the moon (if you couldn't tell) over how the bag looks! I can't wait to swap out from my current handbag to this one! And a very good possibility I will make another with this pattern in different fabrics!
and next up...I think I am going to make a matching wallet using this pattern:
I'll let you know how it goes!
Thursday, November 1, 2012
Book Review
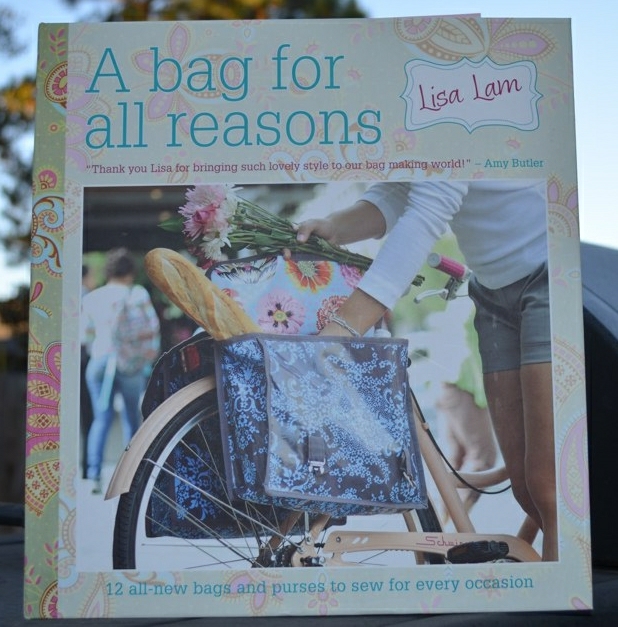
So, some of you might have noticed me go a little bonkers making some bags lately. I've REALLY enjoyed making those bags..I mean REALLY! But a girl can only make so many Ayumi bags (not that I'm going to stop making those!) before she might want to branch out and try another kind of bag. So while at B&N this weekend...I picked up this book:
and WOW! WOW! Seriously...WOW! What a FANTASTIC book! Ok...let me start out by saying that I NEVER planned on making bags, never thought it would interest me, no way-no how. However, after the Ayumi bags, I really wanted to do more. But I really needed a recipe with clear, easy to follow instructions. And this book has them!
The first portion of the book has a great breakdown on some basics like understanding patterns, inserting different types of zippers, constructing different straps, use of snaps, etc. All very helpful for me as I haven't worked with any of them before.
So after reading the book cover to cover pretty much (SO MANY CUTE BAGS!), I decided to try out this one:
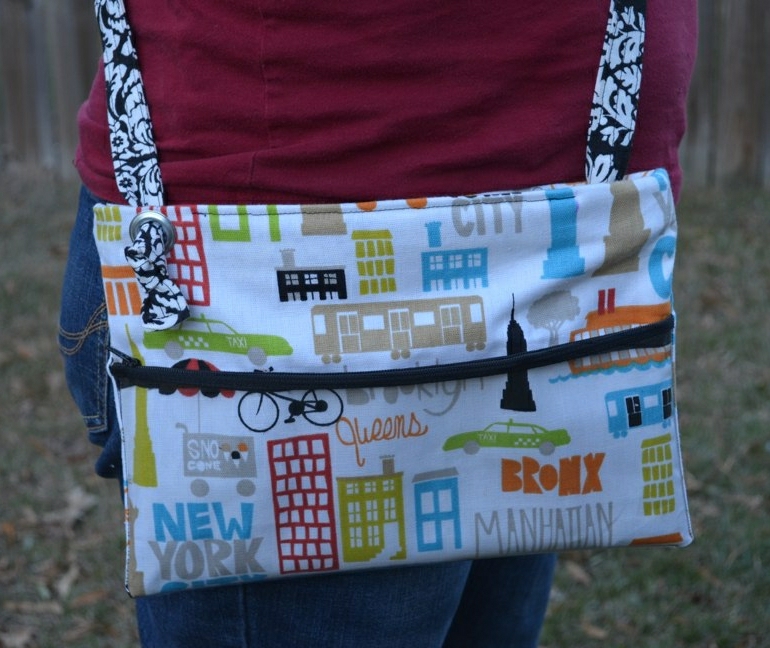
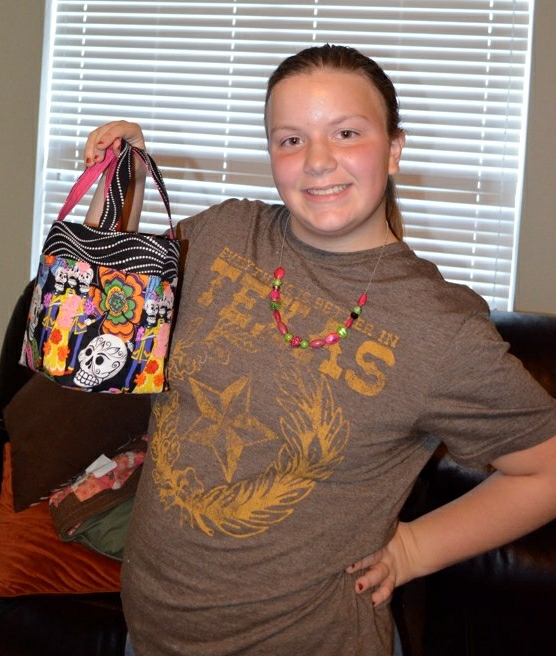
The Access-All-Areas Pouch. And ta-dah, here it is (modeled by Girl, who is now the bag owner as she thought it was adorable and fantastic and some other stuff):
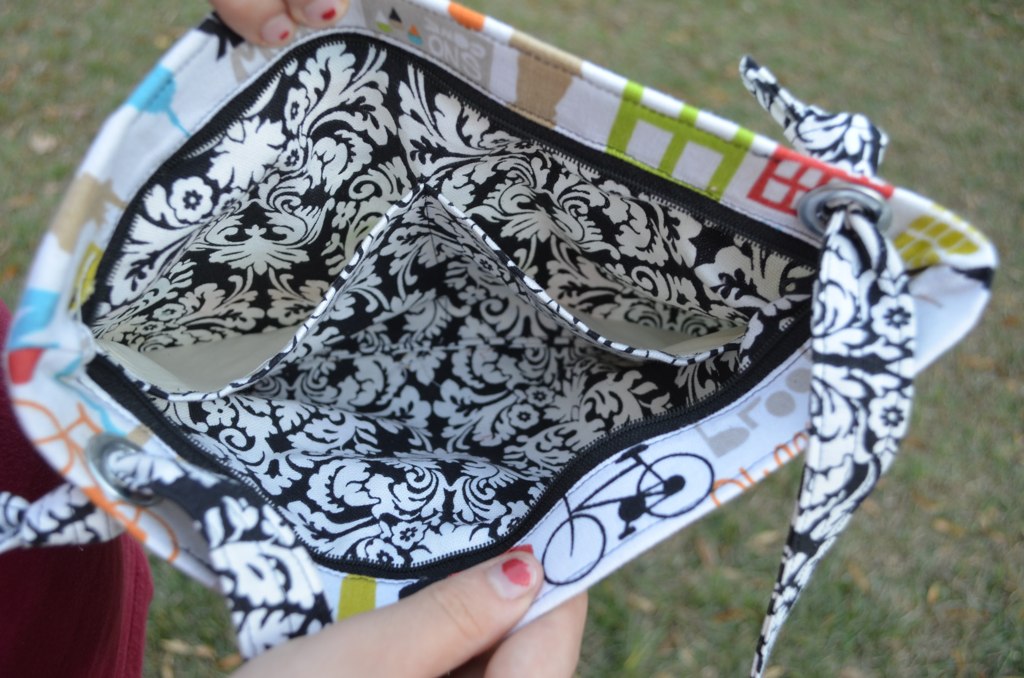
and the inside:
I must confess, I didn't cut the fabric properly, so I didn't have quite enough left to make the inner pockets as called for in the pattern. So after reading it a few times, I figured why not go with what I did manage to have left. So I ended up adding a little Pellon 911FF to give it a little more structure (not much, just a smidge more) and lining the pocket with some muslin I had buried in my stash. and the pocket worked out perfectly (just the right height for a cell-phone).
The instructions were very easy to follow. I worked with clear vinyl...yeah definitely a new experience there, and now I feel ok doing it. I was able to add two zippers (in two different ways) and played with a new Pellon (for me), Pellon 72F, which I found to work great for the "extra-stiff, double-sided fusible interfacing" called for in the book.
The ONLY complaint I would have is really against me, I didn't read the instructions properly for the eyelets, so the bag almost got scratched out of frustration with the eyelet not setting properly.
I'm loving this book! I'm looking forward to making another bag out of the book (in particular the Too Cool for School Satchel!). I very highly recommend this for anyone interested in making bags!
Legalese:
I purchased this book myself, on my own. I was not provided this book nor compensated in any way for this review. All opinions presented are MY OWN!
and WOW! WOW! Seriously...WOW! What a FANTASTIC book! Ok...let me start out by saying that I NEVER planned on making bags, never thought it would interest me, no way-no how. However, after the Ayumi bags, I really wanted to do more. But I really needed a recipe with clear, easy to follow instructions. And this book has them!
The first portion of the book has a great breakdown on some basics like understanding patterns, inserting different types of zippers, constructing different straps, use of snaps, etc. All very helpful for me as I haven't worked with any of them before.
So after reading the book cover to cover pretty much (SO MANY CUTE BAGS!), I decided to try out this one:
The Access-All-Areas Pouch. And ta-dah, here it is (modeled by Girl, who is now the bag owner as she thought it was adorable and fantastic and some other stuff):
and the inside:
I must confess, I didn't cut the fabric properly, so I didn't have quite enough left to make the inner pockets as called for in the pattern. So after reading it a few times, I figured why not go with what I did manage to have left. So I ended up adding a little Pellon 911FF to give it a little more structure (not much, just a smidge more) and lining the pocket with some muslin I had buried in my stash. and the pocket worked out perfectly (just the right height for a cell-phone).
The instructions were very easy to follow. I worked with clear vinyl...yeah definitely a new experience there, and now I feel ok doing it. I was able to add two zippers (in two different ways) and played with a new Pellon (for me), Pellon 72F, which I found to work great for the "extra-stiff, double-sided fusible interfacing" called for in the book.
The ONLY complaint I would have is really against me, I didn't read the instructions properly for the eyelets, so the bag almost got scratched out of frustration with the eyelet not setting properly.
I'm loving this book! I'm looking forward to making another bag out of the book (in particular the Too Cool for School Satchel!). I very highly recommend this for anyone interested in making bags!
Legalese:
I purchased this book myself, on my own. I was not provided this book nor compensated in any way for this review. All opinions presented are MY OWN!
Saturday, October 20, 2012
Rainbow Strings...and I made a bag!!!
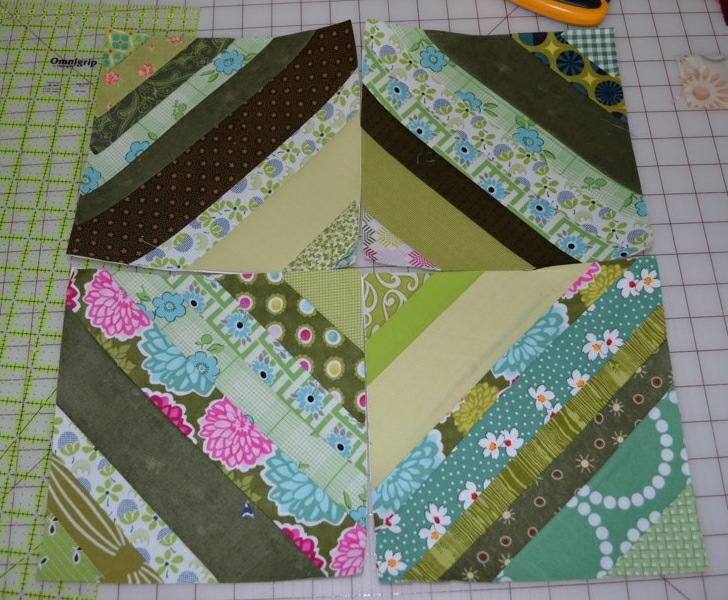
Ok...after having so much fun piecing my Scrappy Stash QAL blocks...and loving the yummy rainbowy goodness of all the blocks laid out...I decided to continue the rainbow theme AND try something new...and so the past few days I have been putting together my Rainbow String blocks!
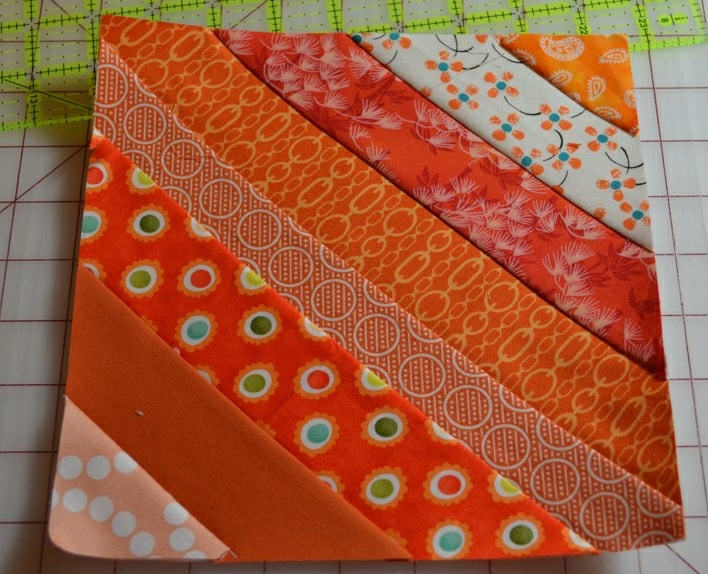
Blue:
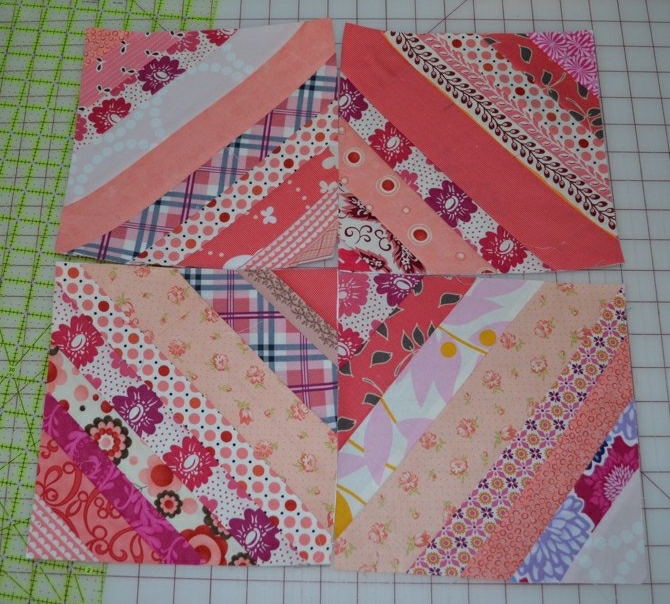
Pink:
Green:
and the rest that I have done:
17 of 36 complete!!!
The whole plan is...Scrappy Stash is for one niece...and the Rainbow Strings is for her sister! I wanted to make them quilts...and wanted them to be similar, but not identical (originally I was going to make 2 scrappy stash quilts)...and well...this is where I'm at!
and then...today...I got this wild idea that I wanted to make my daughter a bag...and after we wandered around the store looking for a good pattern...we took a lunch break...and it hit me...THIS ONE!!! I pulled it up on my phone...and Girl agreed! So after we ate...we went straight back to the store and picked up some fabric and some Pellon 809. and then...we got home and I got straight to work!
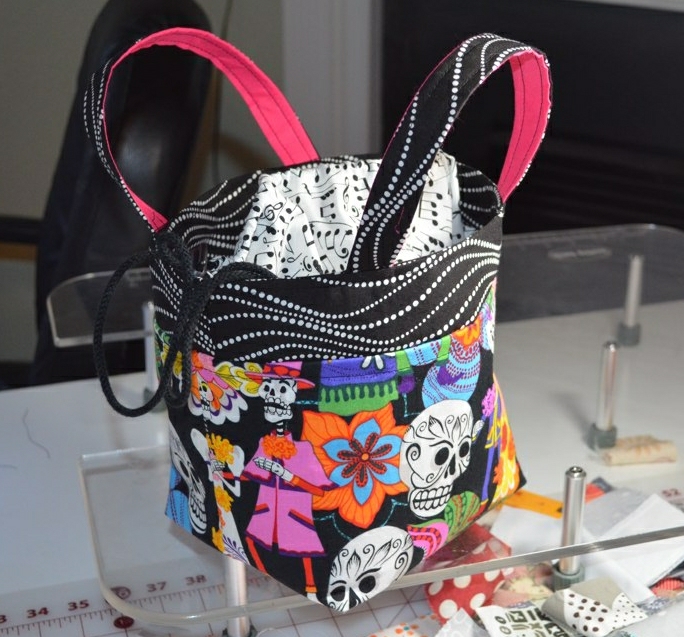
and let me tell you...it was danged HI-LAR-I-OUS in my house! I was jumping up and down and grinning and hollering "I made a BAG!!!" (a lot...apparently I told Guy many many times how I had made a bag!) I was a bit proud of me... and here it is:
And Girl LOVES it! She even said she was going to take it to school!
WOW! My life is now complete! So I got started on another one...that I'll share with you tomorrow...maybe...I have all the fabric ready to go...
I'm very excited about this one!!!
Blue:
Pink:
Green:
and the rest that I have done:
17 of 36 complete!!!
The whole plan is...Scrappy Stash is for one niece...and the Rainbow Strings is for her sister! I wanted to make them quilts...and wanted them to be similar, but not identical (originally I was going to make 2 scrappy stash quilts)...and well...this is where I'm at!
and then...today...I got this wild idea that I wanted to make my daughter a bag...and after we wandered around the store looking for a good pattern...we took a lunch break...and it hit me...THIS ONE!!! I pulled it up on my phone...and Girl agreed! So after we ate...we went straight back to the store and picked up some fabric and some Pellon 809. and then...we got home and I got straight to work!
and let me tell you...it was danged HI-LAR-I-OUS in my house! I was jumping up and down and grinning and hollering "I made a BAG!!!" (a lot...apparently I told Guy many many times how I had made a bag!) I was a bit proud of me... and here it is:
And Girl LOVES it! She even said she was going to take it to school!
WOW! My life is now complete! So I got started on another one...that I'll share with you tomorrow...maybe...I have all the fabric ready to go...
I'm very excited about this one!!!
Friday, May 25, 2012
distraction...
oh man oh man...can I just say...can I just say that I'm a person who is very easily distracted...and it is pretty obvious if you take a look at my sewing table these days...here is what I'm currently facing (all "arranged" nicely in one section of my table...they were all gathered up from where they had been scattered between different locations on the table and ironing board):
don't you love my crayon-esque circles?
first up...my Tumbler quilt (using my Accuquilt Go):
I've gotten a few rows sewn...and a nice stack of tumblers ready to go...but they sit for now...because I was so easily distracted once I was able to get some Pellon Featherweight and work on this T-shirt quilt:
5 squares have their "borders" on...and another 4 to go...and then they will likely sit for a bit...because I was then distracted by these:
the HST remnants from piecing together all of my Terrain Swoon blocks...which were my leaders and enders for awhile with both the Swoon and the start of the Tumbler rows...that I intend to get sewn into some pinwheel blocks...
speaking of...the Terrain Swoon quilt top is still not pieced together because I was distracted by the Tumbler quilt....my circle of distraction is now complete.
Maybe I'll get one of these things done this weekend...or I'll be further distracted...right now I'm completely distracted by the idea of this fabric...and if I can live without it for a little while longer...or if it's a "must" ASAP...and then of course I'm only mildly distracted anticipating the arrival of this BOM (still a few weeks away)...
I need help! LOL!
don't you love my crayon-esque circles?
first up...my Tumbler quilt (using my Accuquilt Go):
I've gotten a few rows sewn...and a nice stack of tumblers ready to go...but they sit for now...because I was so easily distracted once I was able to get some Pellon Featherweight and work on this T-shirt quilt:
5 squares have their "borders" on...and another 4 to go...and then they will likely sit for a bit...because I was then distracted by these:
the HST remnants from piecing together all of my Terrain Swoon blocks...which were my leaders and enders for awhile with both the Swoon and the start of the Tumbler rows...that I intend to get sewn into some pinwheel blocks...
speaking of...the Terrain Swoon quilt top is still not pieced together because I was distracted by the Tumbler quilt....my circle of distraction is now complete.
Maybe I'll get one of these things done this weekend...or I'll be further distracted...right now I'm completely distracted by the idea of this fabric...and if I can live without it for a little while longer...or if it's a "must" ASAP...and then of course I'm only mildly distracted anticipating the arrival of this BOM (still a few weeks away)...
I need help! LOL!
Saturday, May 19, 2012
a well loved work in progress
so a few weeks (perhaps longer) ago I decided I wanted to attempt a T-shirt quilt...and thanks to this fab tutorial...I was able to at least start...at about 5 this morning...my sleep schedule is a bit off these days...
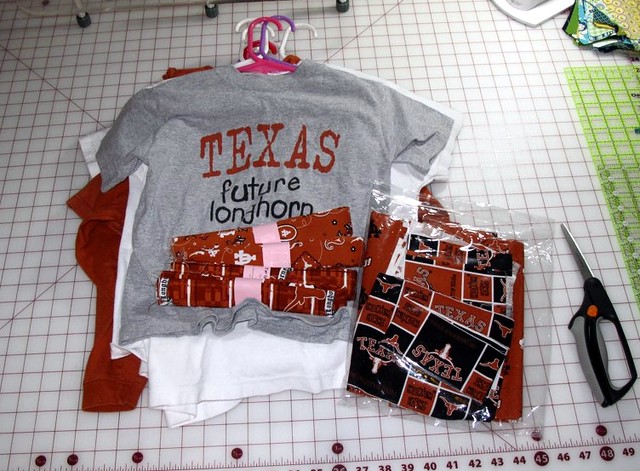
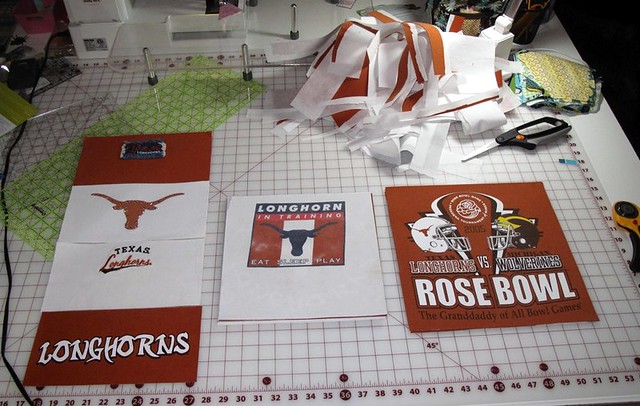
I wasn't entirely sure with what T-shirts I wanted to start...until one day I was talking about maybe using some of our old University of Texas shirts to make a quilt...and Girl popped up and said...oh I have a bunch of those...and she ran up to her room and grabbed a bunch of hangers...with the CUTEST little T-shirts on them...all of them were hers...from back in the day when she was a much shorter little one...As I looked at each shirt she "donated" for the cause...well...I was feeling a tad bit emotional...she once was that small! and my...how she has grown since then...sniff...so I knew immediately that this particular quilt would be special...simply because of the memories...so I pulled what Texas Longhorn related stuff I had in my stash and set out to get going...
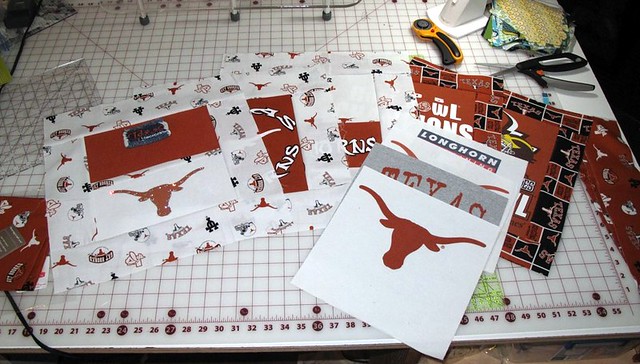
and after a bit of trimming...and a few moments where my throat closed up and I remembered my Girl when she was about 5 years old...I ended up with this...
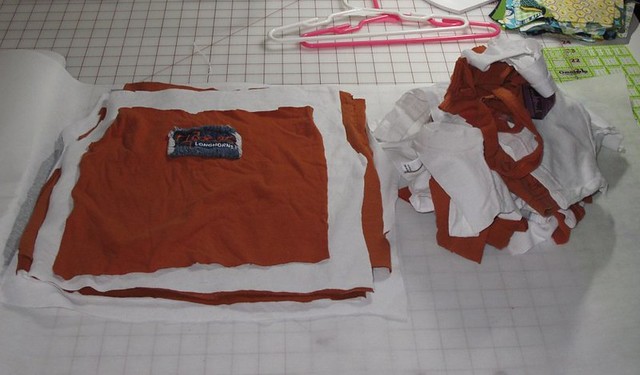
and then after adding some Pellon Featherweight I ended up with this...
enough for 9 total blocks...(still working on the final block sizing). I'm currently trying to figure out what size I want the blocks to be in the end...and what size borders I'll need for each block...and if I'll have enough of any one fabric to do anything completely cohesive...but in the end...I know it won't matter...this quilt is too special to be worried about the little things...
I wasn't entirely sure with what T-shirts I wanted to start...until one day I was talking about maybe using some of our old University of Texas shirts to make a quilt...and Girl popped up and said...oh I have a bunch of those...and she ran up to her room and grabbed a bunch of hangers...with the CUTEST little T-shirts on them...all of them were hers...from back in the day when she was a much shorter little one...As I looked at each shirt she "donated" for the cause...well...I was feeling a tad bit emotional...she once was that small! and my...how she has grown since then...sniff...so I knew immediately that this particular quilt would be special...simply because of the memories...so I pulled what Texas Longhorn related stuff I had in my stash and set out to get going...
and after a bit of trimming...and a few moments where my throat closed up and I remembered my Girl when she was about 5 years old...I ended up with this...
and then after adding some Pellon Featherweight I ended up with this...
enough for 9 total blocks...(still working on the final block sizing). I'm currently trying to figure out what size I want the blocks to be in the end...and what size borders I'll need for each block...and if I'll have enough of any one fabric to do anything completely cohesive...but in the end...I know it won't matter...this quilt is too special to be worried about the little things...
Subscribe to:
Posts (Atom)